How to get a Police Clearance Certificate?
Pre-departure steps before applying for your student VISA

Talks about artificial intelligence, building SaaS solutions, product management, personal finance, freelancing, business, system design, programming and tech career tips
So you are have finalized your grad school🎓 and eagerly waiting🥱 for the I-20 to arrive! Well, one of the documents that might come in handy for the VISA application is a Police Clearance Certificate. Depending upon the country✈️ in which you would be going to pursue your higher education it might be either compulsory or optional. I would advise getting it anyways as it might serve as a crucial document📃 to support your character😀 or conduct in society in later phases.
Steps 🗺️:
- Visit the official Passport Seva Website maintained by the Government of India.
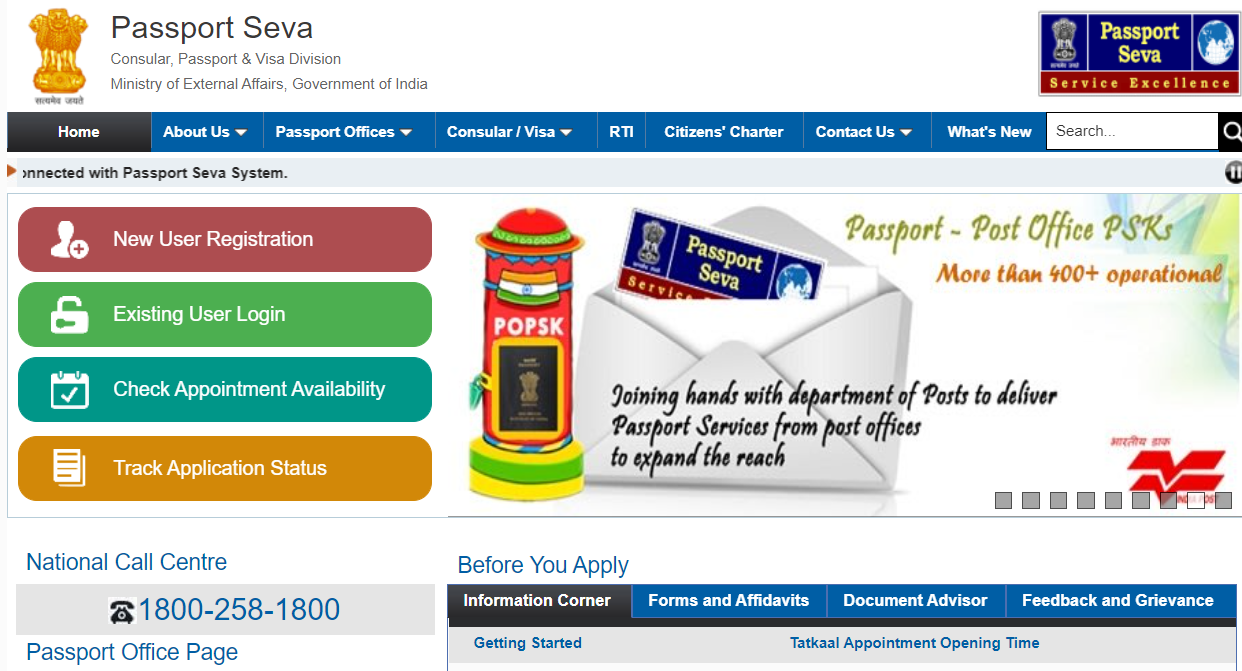
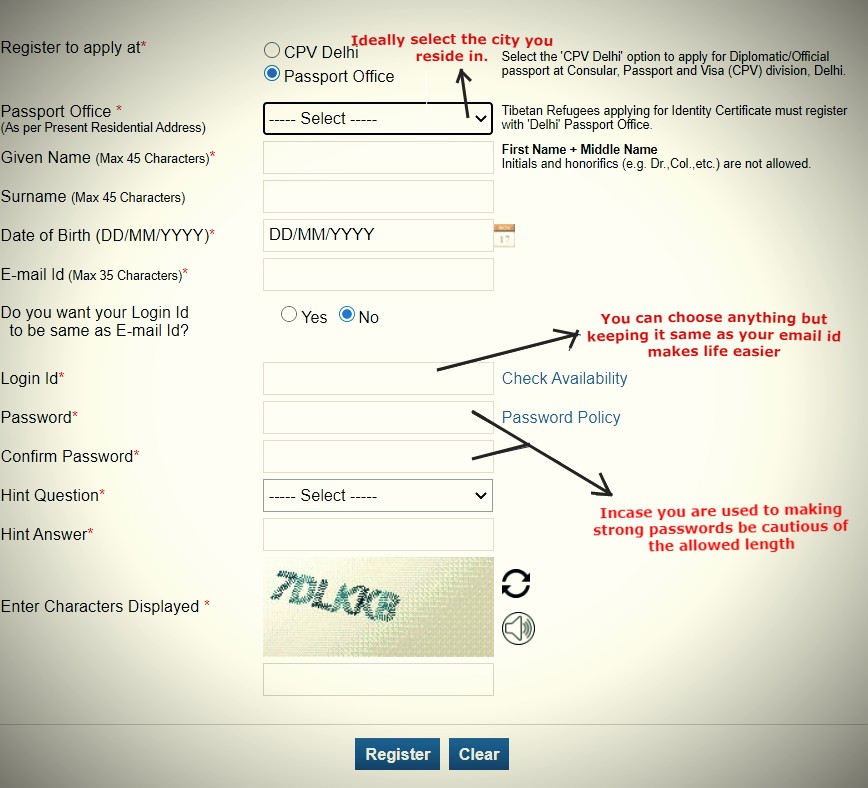
- In case you don't have an account, do register for a new one.
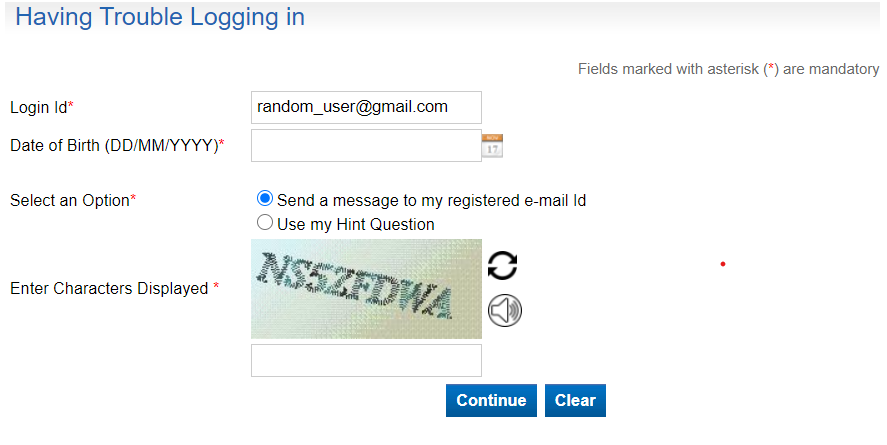
NOTE💡: Just to avoid any issues regarding duplicate accounts, try out logging in/recovering credentials with your current email ids first
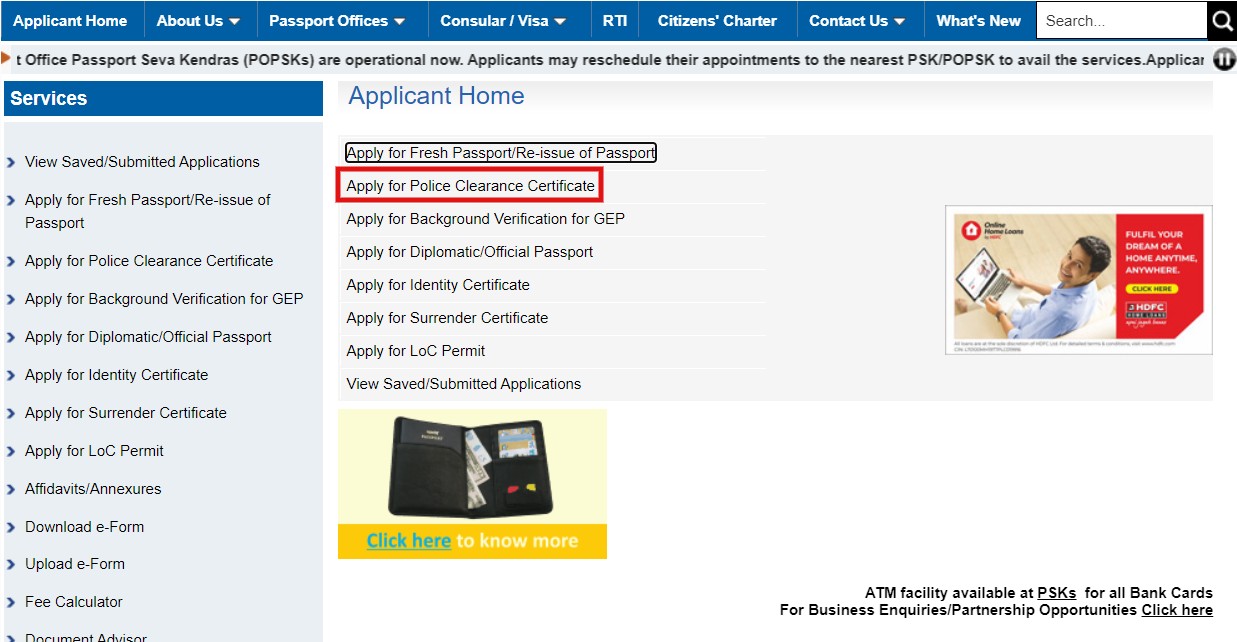
Log In to your account.
Choose the
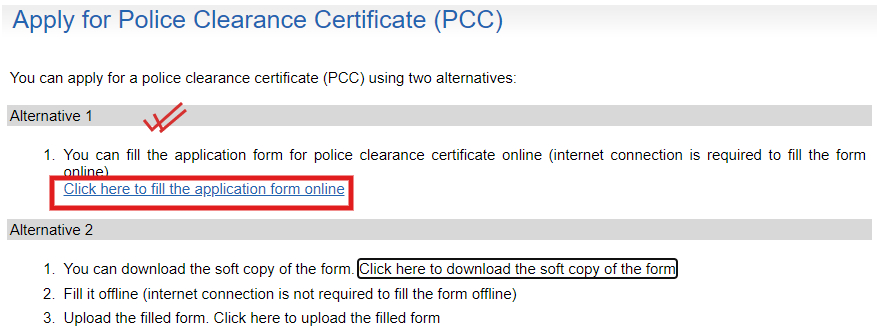
Apply for Police Clearing Certificateoption.
- Although you can download a soft copy of the application form and re-upload it after filling in the details, I would advise going with the first option where you complete the entire application online.
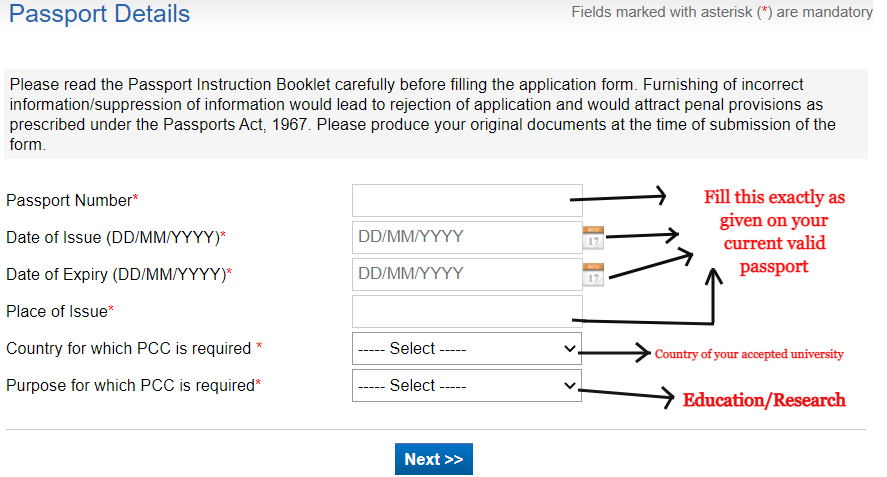
- Provide basic information from your passport and information related to the purpose of the Police Clearance Certificate.
- Proceed to update your personal details ( If you are a legal resident in the Republic of India in the 2020s, I assume you must be having an Aadhar Card. Please do provide the appropriate details of the same. Additionally, I would advise providing your PAN Card number as well. Not mandatory but may be used later to confirm that you don't have any pending taxes.)
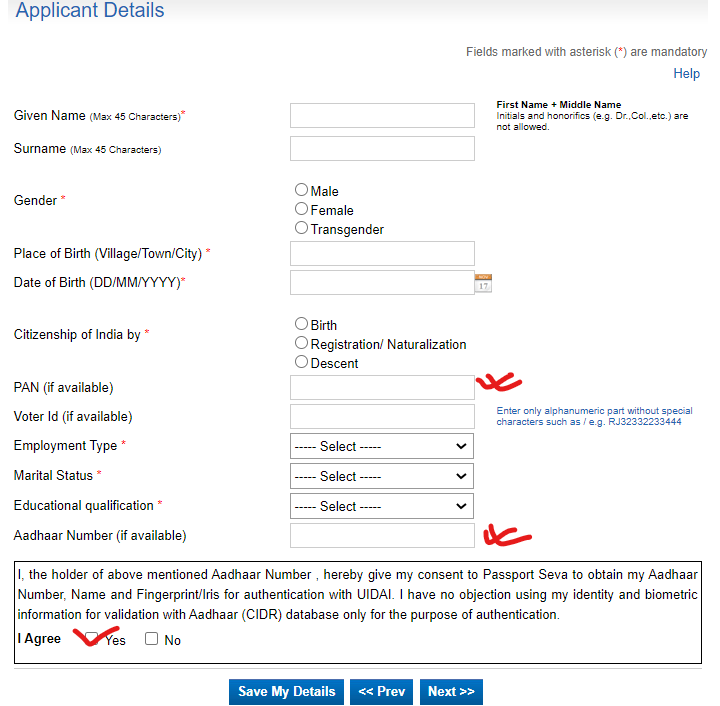
NOTE💡: If you are yet to graduate this summer, please choose Student for the Employment option. Otherwise, choose the appropriate option if you have already graduated.
- Now, fill in the information regarding your parents.
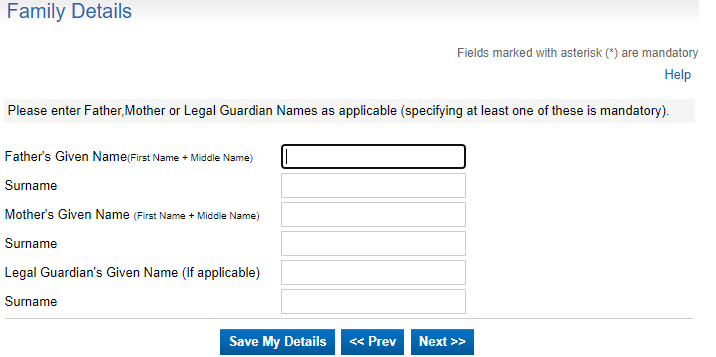
NOTE💡: Try to ensure it is consistent with the information on their passport (if they have one) or Aadhar card.
- Provide your address details
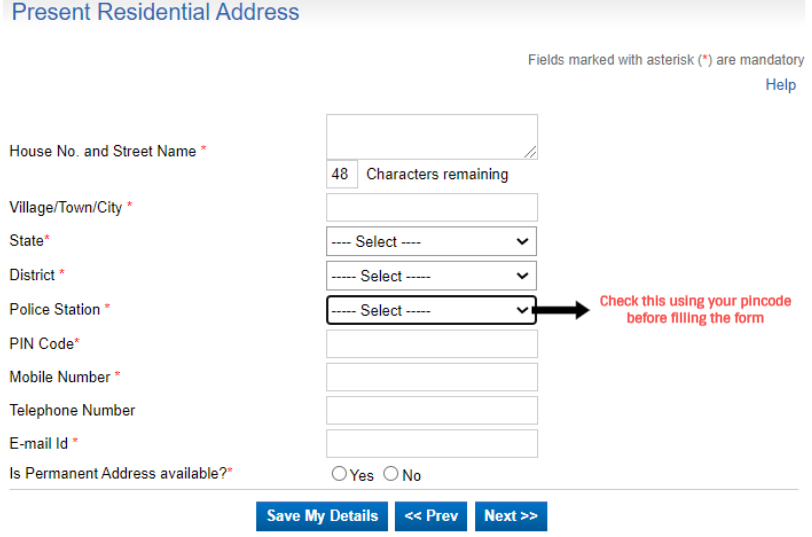
NOTE 💡: In case you are applying to a Passport Seva office in a state where you do not have a permanent residence (in simpler words, Don't own a property whose address is present on your Aadhar Card, etc), make sure you give your current address (perhaps your hostel/rented place) and provide your permanent address as well after clicking on YES following by selecting NO when they ask you if the above address is same as your permanent address.
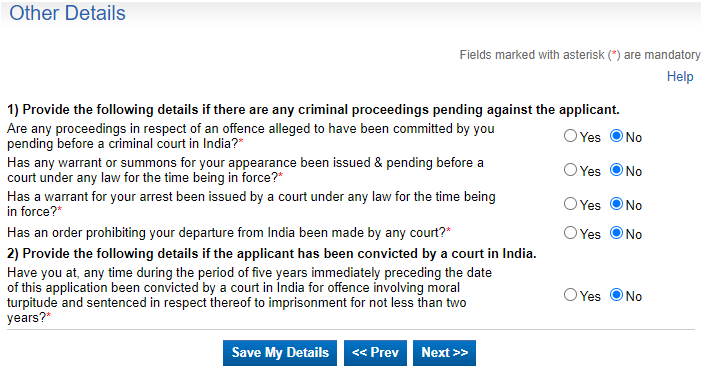
- Now with truthfully declare your past criminal record. (Don't worry much unless you been previously arrested or convicted or have any ongoing case against you in a court of law )
- Finally, sign the self-declaration by entering the data and place to confirm the correctness of the information you have entered
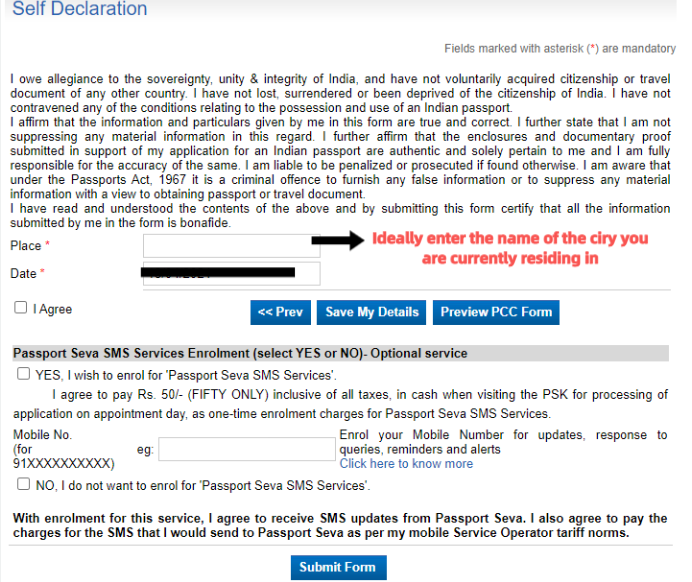
NOTE 💡: I would personally advise selecting the option to opt-in for mobile tracking which would cost you an additional 50Rs. (To be paid on your visit to Passport Seva Kendra). This makes the tracking of the progress of the application much simpler.
Now, Press
SUBMITonce you are sure that you have filled out everything correctly.Your application is submitted!🎉 However, there are two more steps left.
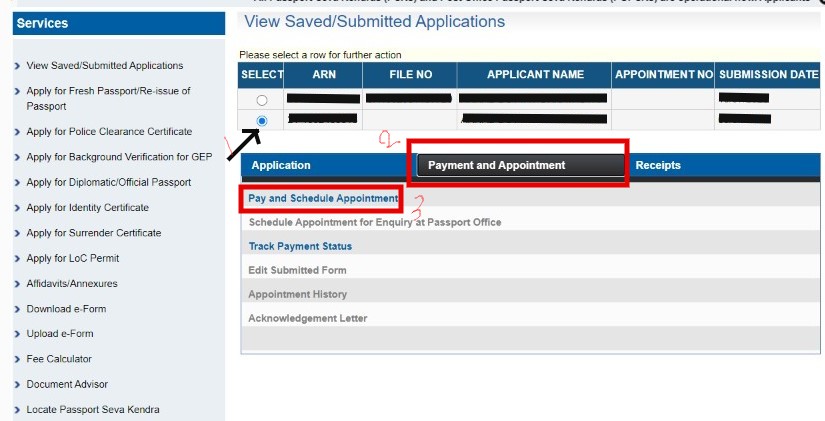
Return to the Passport Seva Home Page, select your recent PCC application, click on the
Payment and AppointmentTab, and press the option forPay and Schedule Appointment.
- Select the payment mode. Ideally, I would advise going with the
Online Paymentoption.
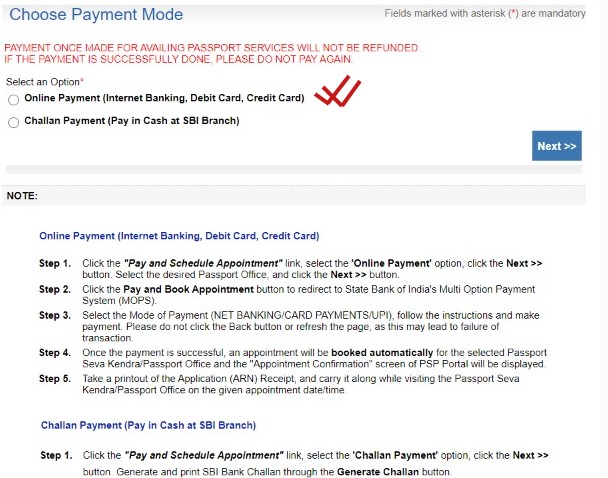
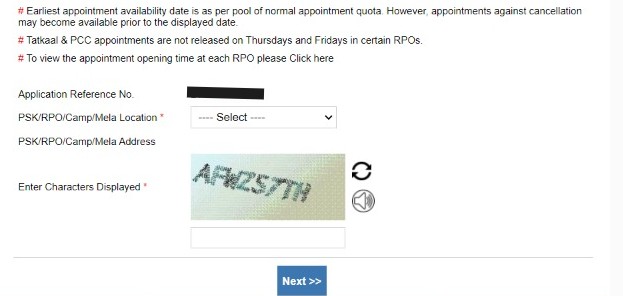
Now you would be able to see a list of available Passport Seva Kendra (PSK), Post Office Passport Seva Kendra (POPSK), Passport Seva Laghu Kendra(PSLK), or Regional Passport Office (RPO) near your location with their earliest possible dates for appointments.
Select the one at your convenience. ( I personally prefer going for the PSK if it's available)
On the next page, you would also have options to select later dates.
- Pay the fees of Rs 500.
- Select the option to print the Confirmation and download the PDF. Although you can directly show your application message from your mobile, having the filled application page with the payment and submission complete would make things simple and fast once you reach the Passport office.
Further steps:
- Get a couple of photocopies for the back and front pages of your passport (which contain your necessary details like passport number, name, etc)
- Get a printout of the above Application Form
- Put them inside a transparent folder ( If you don't have a medium-sized transparent folder for your documents, I would highly suggest getting one since it would be helpful in keeping all your important documents in a single place in the later steps as well)
- DON'T lose your passport 🤣
- You will see that you would be given a time🕑 for reporting which would be ideally 15 min before the time for your appointment. (Check your application receipt or the message on your phone from Passport Seva)
- On the day of appointment leave your house at a particular time to ensure you reach 3-4 minutes before the reporting time ( There is no point of reaching early since you won't be even allowed to enter. That being said, Please🙏 don't be late)
- Just carry the transparent folder containing a photocopy of your passport pages (first and last), your appointment application, your original passport, Rs 50 in cash💵 to pay for the mobile tracking services. You don't need anything else. Don't be worried much and stay cool😎!
- On entry, you might need to go to the registration desk where you would be assigned a token. This would be sent to your phone number as well as written on your application form.
- Proceed ahead, check the board for the counter against your token number.
- If the allotted counter is empty proceed directly for your interview.
- Don't get tensed. You would be asked simple questions regarding what your profession, residence, etc. Think of it like you are meeting someone new at a school party.
- You would be requested to provide your biometrics as well as get a picture clicked. ( PRO TIP: In case you are tired of dull looking pics on your official documents, I would advise getting up early on the day of the appointment and spending some time on your hair, grooming, etc😂)
- You might need to go to 1-2 more counters where you may/may not be asked some similar questions.
- After that, you would be asked to leave and your application would be forwarded to the nearest police station to initiate background checking, etc thereby initiating your police verification process.
- Typically, within a week or 10 days after your appointment, your PCC would be dispatched.